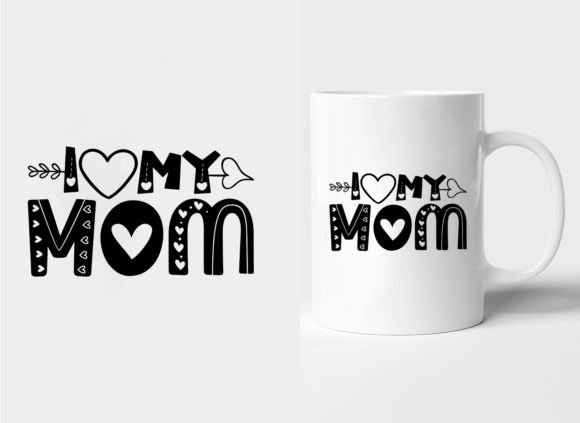
I Love My Mom Mother’s Day Mug: Why Typography Quality and File Choice Matter More Than You Think
When you set out to create a heartfelt gift for Mother’s Day, few ideas feel as warm and personal as a custom mug or T-shirt with a meaningful quote. The I Love My Mom Mother’s Day Mug concept has become a favorite for good reason: it combines a simple, universal sentiment with the flexibility of typography design. But if you are a small business owner, hobbyist, or creator shopping for digital files—whether for a single gift or a print-on-demand product line—there are several details that can make the difference between a keepsake your customer treasures and a project that falls short. Many people choose a design based on the words alone, only to discover later that resolution, file format, or application method ruined the final result.
What the Design Actually Includes and Why That Matters
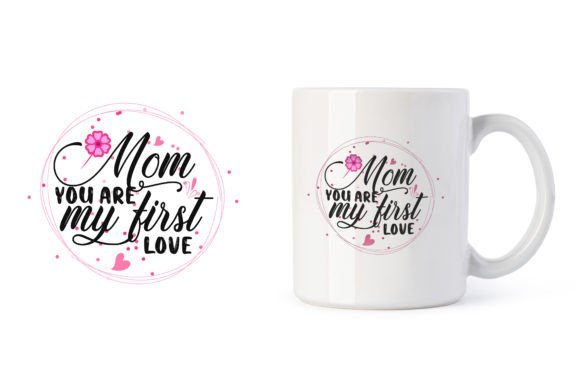
The I Love My Mom Mother’s Day Mug design is usually offered as a set of digital clip art files that include typography centered on high-quality Mother’s Day quotes. A typical download package provides a PNG file at 4500 x 5400 pixels, an EPS file, a JPEG file, and often an SVG cutting file. The promise is that these files are ready to print, but “ready to print” does not mean equally ready for every surface or every machine. Understanding what each file type does well is the first place where many people make a costly mistake.
PNG files at that resolution give you a transparent background and enough detail for most direct-to-garment printing or mug sublimation. EPS files are vector-based, meaning they scale to any size without losing crispness—ideal if you want to enlarge the quote for a poster or shrink it for a sticker. JPEG files compress some data and are fine for mockups but less ideal for final production. SVG files are perfect for cutting machines like Cricut or Silhouette, but only if the design has been properly prepared with clean paths and no stray nodes. Downloading a bundle and assuming every file does the same job usually leads to frustration when your cut machine starts skipping or your printed colors come out muddy.
Resolution and Scaling Assumptions
A common misunderstanding is that a high pixel count alone guarantees sharp printing. A PNG at 4500 x 5400 pixels is indeed generous, but if you scale that image up beyond 100 percent in your design software, you will see pixelation. The trick is to use the vector file—the EPS or SVG—when you need to resize. Many beginners open the JPEG or PNG and stretch it to fit a large T-shirt back design, only to end up with jagged edges and blurry lettering. The better approach is to open the EPS file in a vector editor like Adobe Illustrator or Inkscape and resize the artwork proportionally. This keeps every curve of the typography smooth, regardless of the final print size.
Another overlooked detail is the canvas size in relation to the product template. If you are printing on a standard 11-ounce mug, the printable area is roughly 8 by 3 inches. A 4500-pixel-wide design is much larger than that. Instead of just shrinking the file, check that the typography remains readable and well-proportioned at the smaller scale. Sometimes a quote that looks beautiful on a full-page mockup becomes cramped or loses its visual hierarchy when reduced to mug size. Preview your design at actual print dimensions before you commit to production.
File Compression and Extraction
Digital design bundles are almost always delivered as ZIP files. The instructions tell you to extract them using WinZIP, WinRAR, or by double-clicking. It sounds straightforward, but a surprising number of people try to open the ZIP directly in their design software without extracting. This can corrupt the files or cause missing data. Always extract the folder to your desktop first. Then open the individual files from the extracted folder. This small habit saves time and prevents the frustration of a file that won’t load or prints with artifacts.
Additionally, some sellers include the EPS file in a format that older software versions cannot read. If you are using a legacy version of CorelDRAW or an older Adobe suite, check whether the EPS is compatible. When in doubt, the SVG file is usually the safest bet for vector work across different programs because SVG is an open standard and supported by almost every modern design tool.
Ignoring Color Limitations
The typography in a Mother’s Day quote design may look stunning on your screen with gradients, drop shadows, and multiple colors. But if you are sublimating onto a mug or printing with a limited color palette for direct-to-garment, those effects may not transfer cleanly. The I Love My Mom Mother’s Day Mug design often features elegant script fonts with delicate thin strokes. When you print a thin white or light-colored script onto a dark mug, the fine lines can disappear if the sublimation paper shifts even slightly. A better choice is to use a design with slightly bolder typography or to test on a light-colored mug first. For dark garments, consider a white underbase layer or choose a design that is already optimized for contrast.
Neglecting Bleed and Safe Margins
Print-on-demand platforms and home pressing setups both require margins. A design that extends exactly to the edge of your mockup will likely have white borders after trimming or wrapping. When applying a quote to a mug, the wrap area must include at least an eighth of an inch of bleed beyond the intended print zone. For T-shirts, keep the artwork at least an inch away from seams and collars. Many digital bundles do not include built-in bleed markers, so you need to add them yourself. Open the EPS or SVG, duplicate your design, set the copy to a faint guide color, and extend it slightly beyond your cutting line. This small step ensures your Mother’s Day message does not end up distorted or cut off.
Practical Advice Before You Buy or Use a Design Bundle
Not every “best selling mothers day mug design” bundle is created equal. Before you purchase, check the listing for specifics about file formats. A bundle that only includes JPEG files is not worth your money if you plan to resize the design. Look for bundles that offer EPS or SVG in addition to PNG. Also check whether the design is true typography or if it contains rasterized text layers. Rasterized text cannot be edited, and it may lose quality when scaled. True vector typography allows you to change the color or adjust individual letters if needed.
Another point often missed is the license. If you are buying the files to resell printed products on your own store, confirm that the seller offers a commercial use license. Many bundles are labeled for personal use only, and using them for print-on-demand sales violates the terms. Read the fine print so you do not end up with a legal headache or a suspended seller account.
Better Approaches for Different Use Cases
If you are a hobbyist making a single mug for your own mom, the PNG file at full resolution will work perfectly. Print it on sublimation paper and press according to your machine’s instructions. If you are a small business owner creating a line of Mother’s Day apparel, invest the extra time to open the EPS file and adjust colors to match your brand palette. Keep the quote layout but change the hues so the design feels unique to your shop.
For cutting machine users, the SVG file is your best friend. But test the file first. Open it in your design software and check that all letters are connected properly, especially in script fonts. Sometimes thin connectors between letters are too fragile for vinyl cutting and will break during weeding. In that case, weld the letters together or use a slightly thicker font weight. A quick test cut on scrap vinyl saves you from ruining a sheet of expensive adhesive vinyl.
For those using iron-on transfer paper, remember that the PNG file must be mirrored before pressing. Mirroring is crucial for any transfer that uses a heat press, yet it is one of the most frequently forgotten steps. Set your software to flip the image horizontally before you print. If your design includes text, mirrored text will look backward on the paper but correct on the final product. Neglecting this step ruins the shirt and wastes materials.
How These Mistakes Affect Your Satisfaction and Costs
Every misstep in file handling or application method adds to your bottom line. A misprinted mug or shirt means you lose the cost of the blank, the transfer material, and your time. If you are fulfilling customer orders, errors damage your reputation and lead to refunds or negative reviews. Learning to use the appropriate file format for each method—vector for scaling, PNG for direct printing, SVG for cutting—eliminates most of these problems before they start.
Additionally, using a poorly prepared digital bundle can lead to frustration that makes you give up on a project altogether. The I Love My Mom Mother’s Day Mug design concept is too good to abandon because of technical hiccups. With a few straightforward precautions, you can turn a simple digital download into a polished, professional gift that genuinely touches the recipient.
Final Considerations for a Polished Result
When you are ready to produce your final product, test one sample before running a batch. Print a single mug or one shirt and evaluate the alignment, color saturation, and readability of the typography. Adjust your settings based on what you see. A product that looks good in a digital mockup can still surprise you on fabric or ceramic. Trust the test, not the preview.
Also consider pairing the typography with a simple graphic element, like a small heart or floral accent, to add visual interest without overwhelming the quote. The best Mother’s Day designs balance beautiful lettering with enough negative space to let the message breathe. Resist the urge to fill every inch of the printable area. Sometimes a minimal layout has the strongest emotional impact.
Ultimately, the I Love My Mom Mother’s Day Mug and accompanying typography designs offer a versatile foundation for heartfelt gifts and profitable products. The difference between a mediocre outcome and a stunning one comes down to how carefully you handle the digital files, how well you match the format to your production method, and how much attention you pay to the small details that most people skip. By avoiding the common mistakes around resolution, file extraction, color limitations, margins, and license terms, you set yourself up for a smooth process and a final product that looks exactly as good as you imagined.